

Quick Summary
Measure the usable terrace, then mark tentative zones for the sauna, cold plunge, changing area and walkways before selecting equipment. Have the deck, balcony or slab reviewed for the actual equipment, water and occupant loads. Treat the example dimensions below as layout ideas only: structural capacity, drainage, clearances and electrical requirements depend on the site, product instructions and local rules.
- Measure the terrace and mark proposed equipment footprints and walking routes with chalk or removable tape.
- Water weighs about 8.34 pounds per U.S. gallon. A 100-gallon plunge contains about 834 pounds of water, before adding the tub, people or equipment.
- Ask a qualified builder or structural engineer to assess the supporting structure and concentrated loads before placing heavy equipment.
- Allow room for doors, entry, safe movement and maintenance. Use the sauna and plunge manuals for required clearances.
- Plan surface drainage with a qualified contractor. Do not assume a single slope or drainage detail works for every terrace.
Start With the Space You Actually Have
Outdoor sauna terraces are easier to plan when the layout starts with the real site rather than a catalog photo. Measure first, then decide what fits.
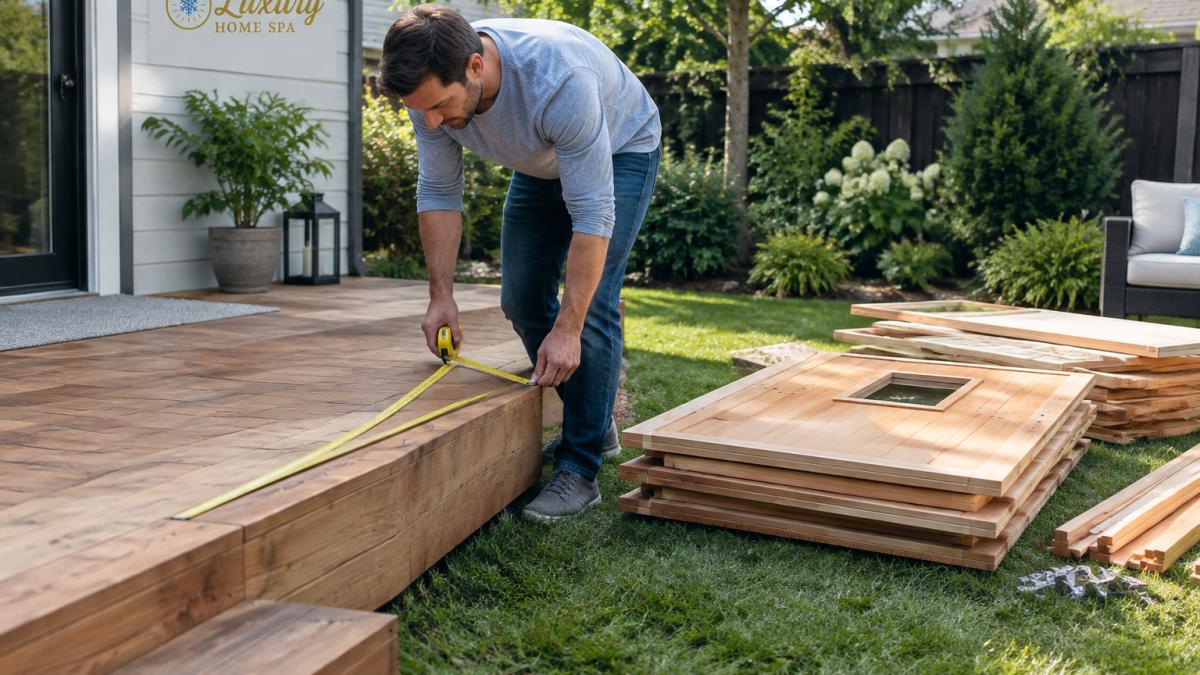
Before choosing the sauna, measure the usable terrace and mark where people will walk, sit and cool down. A tape measure and removable chalk or tape can help you lay out proposed footprints. Walk through the arrangement as if you were using it. A space that looks generous on paper can feel cramped once a plunge, bench and open door are included.
Measuring the terrace and marking usable zones
Record the overall dimensions, then note obstacles and areas that cannot be used. Mark these proposed zones:
- Sauna zone: the sauna footprint, door operation and any product-specific clearances.
- Cooling zone: the plunge footprint and space to enter, exit and dry off.
- Changing zone: a bench, hooks and room to change or towel off.
- Walkway zone: a clear route from the house or steps to the sauna and plunge.
Note sun exposure, prevailing wind, drainage patterns and where water collects after rain. Also check the delivery route and the space needed to install and service the equipment.
Checking Terrace Structure, Load Capacity and Waterproofing
A sauna and a water-filled plunge can impose substantial loads. A terrace designed for ordinary outdoor furniture may not be suitable for this equipment. Confirm the structure’s capacity for the specific installation before finalizing the layout.
Estimating the loads you are placing
For initial planning, collect the manufacturer’s dry weight, filled weight or water capacity, and support footprint for each item. These figures help a qualified professional assess the installation; they do not establish that a deck or slab is adequate.
- Sauna: use the exact model’s shipping or assembled weight from its current specifications. Include the heater, accessories and occupants where applicable.
- Cold plunge: water weighs about 8.34 pounds per U.S. gallon. A 100-gallon plunge contains about 834 pounds of water; a 150-gallon plunge contains about 1,251 pounds, before adding the tub, bather or equipment.
- Other loads: the professional reviewing the structure should account for people, the equipment’s support points, and applicable snow and environmental loads.
Do not rely only on an average pounds-per-square-foot calculation. A compact plunge or sauna base can create concentrated loads that require a separate structural assessment.
What to have a builder or engineer check
Ask a qualified builder or structural engineer to review the framing, joist spacing and span, beams, posts, footings, connections and condition of the structure. For a slab, ask about its thickness, reinforcement, condition and intended use. The review may include:
- Joist size, spacing, span and support conditions.
- Beam, post and footing capacity and condition.
- The plunge’s support points and where those loads transfer into the framing.
- The sauna manufacturer’s foundation or support requirements.
- Any additional snow, wind, water or occupancy loads relevant to the site.
Waterproofing and drainage on a terrace
Plan how rain, splash and water from filling or draining the plunge will be managed. The correct surface slope, waterproofing assembly and drain location depend on the terrace construction, climate, local requirements and any space below the terrace.
- Drainage: direct water away from the house, sauna and structural supports as appropriate for the site. Have a qualified contractor determine the surface slope and drainage details.
- Walking surface: choose a surface suitable for wet conditions and regular outdoor use.
- Plunge area: follow the plunge maker’s support and drainage instructions. Keep fill, drain and service access available.
- Wet areas: select materials and details rated for outdoor moisture exposure. Follow local requirements for membranes and waterproofing.
- Below the terrace: if there is living space or another enclosed area below, have the waterproofing system reviewed before installation.
Do not cover drains or place equipment where a leak or routine service would be difficult to reach. Confirm where discharged water is allowed to go before connecting a drain.
Outdoor Sauna Foundation Requirements for a Terrace
The sauna needs a stable, level support surface that matches the manufacturer’s instructions and the terrace’s structural design. A raised base is not automatically required for every model or installation. Follow the sauna manual for the support surface, clearances, drainage and any airflow requirements.
Potential support options may include an existing slab, a properly designed platform or a manufacturer-approved base. Have the supporting structure reviewed for the selected sauna and site. Check level and dimensions before delivery; an uneven or unsuitable base can affect assembly and door operation.
Clearance and Circulation Measurements to Plan For
Leave room for doors to operate, people to enter and exit, and technicians to reach components that require service. The actual clearances depend on the sauna and heater model, plunge, installation location and local rules. Use the current manuals and have the layout checked before construction.
Also plan a clear route from the house to the sauna and plunge. If the equipment cannot be serviced without moving another heavy item, reconsider the layout.
Sample Terrace Layouts for Small, Medium and Large Spaces
These examples show how a sauna, plunge and changing area might be arranged on rectangular terraces. They are starting points, not guaranteed fits or construction drawings. Actual equipment dimensions, doors, stairs, railings, structure, utility access and required clearances can change the layout. For ideas on integrating the terrace with the surrounding garden, see Medi-Spa’s garden sauna integration guide.
Clearances to build into every layout
Use the following as planning prompts, not universal minimums. Confirm actual dimensions and access requirements in the product manuals and with your contractor or local authority.
- Door and entry: account for the full door operation and space to enter and exit without obstruction.
- Main walkway: preserve a comfortable route between the house, sauna and plunge.
- Sauna and plunge: leave enough space to move safely between them and keep wet traffic away from the sauna entrance.
- Plunge access: allow room for safe entry and exit, plus access to drains, fill connections and service points.
- Heater and maintenance: use the equipment’s required clearances and keep disconnects and service panels accessible.
- Changing area: size any bench or storage to suit the available space without narrowing a required route.
Small terrace: about 8 by 10 feet (80 square feet)
This footprint may be too limited for some sauna-and-plunge combinations once door operation, access and manufacturer clearances are included. Consider a compact sauna or a separate cooling area elsewhere in the yard. Before purchasing, mark the exact sauna and plunge footprints, including any access and service space, and test the route from the house.
Medium terrace: about 12 by 14 feet (168 square feet)
This size offers more flexibility for arranging a sauna, plunge and changing area. One possible layout places the sauna along the back edge, with the plunge to one side and a bench near the house. Check the complete equipment dimensions and preserve the routes and clearances required for the specific models.
Large terrace: about 16 by 20 feet or more (320+ square feet)
A larger terrace may allow separate sauna, cooling and changing zones. Keep a practical route between them and retain access to electrical, plumbing and service points. A rinse station or screen may be possible if the site has suitable utilities and local rules allow it.
Sketching and testing the plan
Draw the terrace to scale and mark the sauna footprint, door operation, plunge, bench, walkways, stairs and railings. Then outline the plan on the actual terrace with removable markers and walk through it. Include the step out of the plunge, the trip back to the house and the space needed for maintenance. This can reveal fit and circulation problems before construction begins.
| Zone | Planning consideration | Check before installation |
|---|---|---|
| Sauna door and entry | Door operation and unobstructed entry and exit | Sauna manual and site layout |
| Main walkway | Clear route between the house, sauna and plunge | Local requirements and household needs |
| Sauna and plunge | Safe movement between wet and dry areas | Exact equipment footprints |
| Plunge access | Entry, exit, filling, draining and service | Plunge manual and utility plan |
| Heater and electrical access | Manufacturer clearances and service access | Heater manual and electrician’s plan |
| Changing area | Bench and storage that do not obstruct circulation | Measured site plan |
Placing the Cold Plunge Beside the Sauna
Placing the plunge near the sauna can make the transition convenient, but leave enough room for safe movement and to keep wet feet away from the sauna entrance. There is no universal required gap between a sauna and plunge; base the distance on the actual equipment dimensions, access needs and site layout.
Consider the step out of the plunge, the surface underfoot and any handhold that may be appropriate. Check the plunge’s filled weight, support requirements, drain and service access against the structural review before installation.
Privacy, Sightlines and Neighbor Considerations
Review sightlines from the street, neighboring windows and inside the house. A sauna terrace may be used in swimwear or towels, so privacy can be part of the layout from the start.
Fences, planters and screens can provide privacy, but check local rules for height and setbacks. Make sure a screen does not block required ventilation, equipment access or safe routes.
Planning Electrical Supply and Utility Access
Sauna electrical requirements vary by heater and model. Review the current product documents with a licensed electrician before selecting or installing circuits. For general spa planning, see the hot tub electrical requirements guide; confirm the sauna’s own requirements separately.
Plan electrical, fill, drain and service routes before finishing the terrace. For cold plunge utility planning, see the cold plunge electrical, plumbing and drainage guide. The electrician and other qualified installers should confirm the appropriate equipment, outdoor protection, permits and local requirements for the specific site.
Planning Your Terrace With My Luxury Home Spa
A measured layout can help you compare product dimensions and identify questions for your builder, electrician or structural engineer. My Luxury Home Spa offers outdoor wellness equipment, including the Thermasol Nordic Misty Terrace.
Review the product specifications and delivery requirements, then contact My Luxury Home Spa for product information and recommendations.
Frequently Asked Questions
How much space do you need around an outdoor sauna?
There is no single clearance that applies to every outdoor sauna. Check the sauna and heater manuals for required clearances, door operation, ventilation and service access. Then add enough room for people to enter and exit safely and for any plunge, shower or changing area in your plan.
Where should you place an outdoor sauna on a terrace?
Choose a location that meets the sauna manufacturer’s requirements, has a structurally suitable support surface and allows water to drain appropriately. Consider access from the house, delivery and service routes, privacy and utility connections. Have the structure and layout reviewed for the specific installation before placing the sauna.
What foundation does an outdoor sauna need on a terrace?
The support surface should be stable, level and appropriate for the sauna model and terrace structure. Requirements vary, so follow the product manual and have a qualified professional confirm that the deck or slab can support the sauna and its occupants. A raised base or waterproof membrane may be appropriate for some installations, but neither should be assumed to fit every terrace.


Leave a comment